
The previous chapters covered individual skills. This chapter assembles them. Follow a real project from idea to deployment, and you will see that Claude Code’s true power is not any single feature — it is the compound effect when they all work together.
Why an AI Weekly Report Generator
A good teaching project needs to be genuinely useful, moderately complex, and match the tool’s strengths. This one checks all three boxes.
The AI Weekly Report Generator connects to your GitHub, fetches all commits from the past week, uses AI to summarize them into a readable report page, and supports one-click sharing with colleagues. It is the thing every engineer does on Friday afternoon in half an hour. We are going to shrink that to ten seconds.
This project touches nearly everything from previous chapters. You do not need to have memorized them — just follow along.
Phase 0: Do Not Write Code Yet
I used to make this mistake constantly: think of an idea, immediately tell Claude to start coding. Halfway through, I would realize the requirements were not clear and have to start over.
Now I have a habit: let Claude interview me first. It is surprisingly good at this.
I want to build a weekly report tool. Before writing any code, interview me to understand the requirements. Ask me questions one at a time about target users, core features, and technical constraints.
Claude acts like a product manager: Who is the target user — individual developers or teams? What are the core features — just report generation, or also sharing? What are the technical preferences — deployment target, framework? Any design references — what should the report look like?
After answering, have Claude compile the conclusions into a SPEC file:
Based on our discussion, create a SPEC.md file that captures all requirements, user stories, and technical decisions.
This SPEC.md becomes the anchor for the entire project. All subsequent development revolves around it.
Why a new session for execution? The requirements interview is conversation-heavy and consumes a large context window. Once SPEC.md is confirmed, start a fresh session. The new session automatically reads SPEC.md and CLAUDE.md and has clean context space for writing code. This is the “when to open a new session” principle from earlier, applied in practice.
Phase 1: Project Initialization
New session, clean start. One sentence to scaffold the project:
Create a Next.js project called
weekly-reportwith Tailwind CSS. Set up the basic folder structure following SPEC.md requirements. Include TypeScript, and configure ESLint.
Claude runs npx create-next-app, installs dependencies, configures Tailwind, and creates the directory structure. You watch every command and file appear in the terminal.
The resulting structure:
weekly-report/
├── app/
│   ├── layout.tsx
│   ├── page.tsx
│   ├── api/
│   │   ├── github/route.ts
│   │   ├── summarize/route.ts
│   │   └── auth/[...nextauth]/route.ts
│   └── report/[id]/page.tsx
├── components/
├── lib/
├── CLAUDE.md
├── SPEC.md
├── tailwind.config.ts
└── package.json
Now the critical step: configure CLAUDE.md. This is the core of the chapter on CLAUDE.md, in practice:
## Project Overview
AI-powered weekly report generator. Connects to GitHub, summarizes
commits with AI, generates shareable report pages.

## Tech Stack
- Next.js 15 (App Router) + TypeScript
- Tailwind CSS for styling
- NextAuth.js for GitHub OAuth
- Claude API (via Anthropic SDK) for summarization

## Code Style
- Use server components by default, 'use client' only when needed
- API routes in app/api/, use Route Handlers
- Prefer named exports
- Error handling: always use try-catch in API routes

## Testing
- Run `npm run lint` before committing
- Test API routes with curl before building UI
With this CLAUDE.md in place, every new session or conversation, Claude knows the project’s technical decisions and code conventions. You never need to explain them again.
Phase 2: Core Development
Now the real work begins. Enter Plan Mode first — do not rush to write code:
I need to implement the core flow: GitHub OAuth login → fetch this week’s commits → send to Claude API for summarization → display the report. Let’s discuss the architecture before coding.
Claude produces a complete technical proposal: how to structure the API routes, how data flows, how to split the components. You can question and adjust at this stage. It feels like whiteboarding with a senior engineer.
Once the plan is solid, exit Plan Mode and let Claude execute:
Plan looks good. Now implement it step by step. Start with GitHub OAuth, then the commit fetching API, then the AI summarization.
Claude follows the discussed plan, creating files and installing dependencies as it goes. You will see it write app/api/auth/[...nextauth]/route.ts for NextAuth configuration, lib/github.ts for the GitHub API wrapper, and app/api/summarize/route.ts for the Claude API integration.
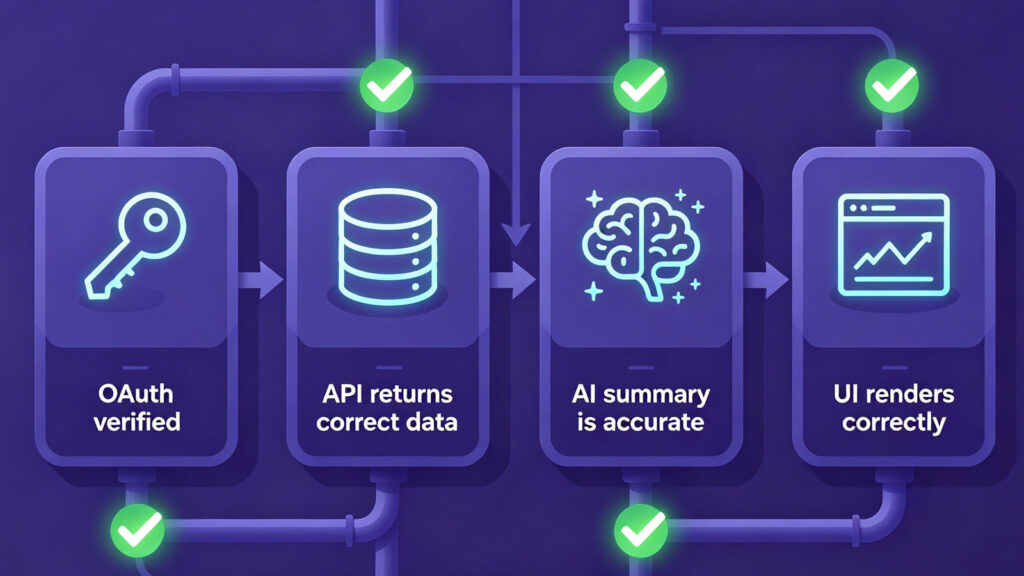
Verify each module before moving on. This is the single most important habit I have developed through many failures. Do not let Claude write all the code and test everything at the end. For OAuth, run npm run dev, click the login button, and confirm the GitHub authorization page appears. For commit fetching, test with curl localhost:3000/api/github and check the returned data. For AI summarization, feed real commit data and verify the report content is reasonable with no hallucinations.
I once let Claude write eight files consecutively, then discovered the second file’s API route was wrong and everything after was wasted. Every step verified saves you from the one after it failing silently.
Phase 3: Make It Look Good
The functionality works. The UI is probably ugly. This is normal. I always get functionality working first and worry about aesthetics later.
Claude Code supports image input. The most direct approach: take a screenshot of the current page and paste it to Claude.
Here is a screenshot of the current report page. Issues: 1) The header is too cramped 2) The commit list needs better spacing 3) Add a share button in the top right.
Claude sees your screenshot, understands the visual problems, and precisely modifies the corresponding CSS and component code.
This “screenshot → feedback → fix” cycle is extremely efficient. In traditional development, you constantly cross-reference between design files and code. Now you just screenshot, describe the problem, and wait for the fix.
A few rounds later, polish the responsive layout:
Test the report page on mobile viewport (375px width). Fix any layout issues. The share button should be full-width on mobile.
Best practice for UI polish: list all issues at once and let Claude batch-fix them rather than one at a time. Batch feedback helps Claude understand the overall design intent.
Phase 4: Extensions in Practice
The core product works. Now apply the extensions chapter in real life: add Skills, MCP, and Hooks.
Create a Skill. Every time you want to generate a report, you open the project and run a sequence of operations. Reduce it to one command. Create .claude/skills/generate-report/SKILL.md:
/weekly-report

Generate this week's report.

## Steps
1. Run the dev server if not running
2. Call /api/github to fetch commits since last Monday
3. Call /api/summarize to generate the report
4. Open the report page in browser
5. Show the shareable URL
Now type /weekly-report in any Claude Code session, and it automatically executes all steps. One command, ten seconds, report done. This is the power of Skills: turn a repeated process into a single action.
Connect MCP: Slack integration. The report is generated, but manually posting it to Slack is friction. Connect the two:
Add a Slack MCP server so the generated report can be automatically posted to the #team-updates channel. Use the Slack Web API with a bot token.
Claude configures the MCP server and registers the Slack connection. Your /weekly-report skill can now include a final step: send the report to Slack.
Set up a Hook: auto-lint. Last extension: every time Claude commits code, automatically run lint checks:
Set up a pre-commit hook that runs ESLint and TypeScript type checking. If there are errors, fix them before committing.
Now every git commit triggers automatic quality checks. This is the classic Hook use case: inject automatic verification at a critical juncture.
Phase 5: Deploy
The product runs locally. Time for the world to see it.
Deploy this project to Vercel. Set up the environment variables for GitHub OAuth, Claude API key, and Slack bot token. Also create a GitHub Actions workflow that runs lint and type check on every PR.
Claude runs the deploy command, configures environment variables, and creates the CI/CD config file. You never open the Vercel dashboard or hand-write a GitHub Actions YAML.
When deployment completes, you get a live URL. Open it in a browser and walk the full flow: log in → fetch commits → generate report → share. Confirm everything works.
For teams also using Claude Code, add one more step:
Add a Claude Code Action to the GitHub repo that automatically reviews PRs for code quality and potential bugs.
Now every PR gets an automatic code review with inline comments. The full CI/CD loop is established.
What This Project Used
A complete web application, from idea to production, entirely in the terminal.
| Phase | What We Did | Chapter Applied |
|---|---|---|
| Phase 0 | Claude interviews us, generates SPEC.md | Prompting & Context |
| Phase 1 | Project init + CLAUDE.md config | Installation + CLAUDE.md |
| Phase 2 | Plan Mode discussion + implementation | Core Workflows |
| Phase 3 | Screenshot feedback + UI iteration | Agent Work Patterns |
| Phase 4 | Skills + MCP + Hooks | Extensions |
| Phase 5 | Vercel deploy + CI/CD | Git Operations |
If things go smoothly, the whole process takes about 5 to 8 hours. The most time-consuming part is Phase 2 — OAuth configuration and API debugging require repeated verification, and environment variables, callback URLs, and other small things each cost you ten to fifteen minutes. If things do not go smoothly, a full day is normal.
The same project, built by hand: a full-stack engineer familiar with Next.js and OAuth would need 2 to 3 days. Someone less familiar might need a week. The gap is not just speed. Throughout this process, you were making product decisions, not implementation decisions. You were thinking about “what information should the weekly report include” and “does the share page need authentication” — not searching Stack Overflow for “how to configure NextAuth GitHub provider.”
Lessons from Building Real Products
A product I built reached the top of the App Store paid charts. People asked if I had a development team. The answer is no. From the first line of code to App Store submission, AI wrote everything. I have never written a line of code by hand.
That does not mean the development process was easy. I hit many walls. Here are the most important lessons.
One: Break requirements into the smallest verifiable steps. The most common beginner move: excitedly dump the entire product spec on Claude — “build me a complete app with login, database, payments, push notifications, sharing…” Claude will start working, but the result is usually a mess. Instead, break it down. First, implement login and verify it works. Then data storage — can it save and retrieve? Then core business logic, then UI. Verify each step before moving to the next.
Two: Ship the smallest working version first, then add. Build a minimal viable version and use it yourself for two days. The features you imagine you need and the features you actually need once you are using it are often very different.
Three: Verification matters more than development. Claude Code writes code fast enough to create an illusion: it wrote it this quickly, so it must be right. Not necessarily. AI-generated code needs verification just like human-written code needs tests. The difference: a human might write 200 lines a day, so verification is manageable. Claude Code can write 2,000 lines an hour. If you do not verify, problems explode later at much higher cost. After every functional module, open the browser or run the tests immediately. Find problems, fix them immediately. Do not let them accumulate.
Four: One session, one concern. Claude Code sessions have context window limits. If you mix frontend changes, backend adjustments, deployment configuration, and bug fixes in one session, context becomes chaotic and Claude’s response quality noticeably degrades. In practice, I split sessions like this: Session 1 for project init and infrastructure, Session 2 for core backend logic, Session 3 for frontend pages and interactions, Session 4 for testing and bug fixes, Session 5 for deployment and CI/CD. Each session focuses on one category. Context transfers between sessions through CLAUDE.md and the code itself. Far more efficient than dragging out one marathon session.
Five: Product sense is your biggest leverage. Claude Code can write code, polish UI, configure deployments, and fix bugs. What it cannot do: decide what problem this product should solve. Who the target user is. What features to include and what to cut. These are product judgments — they come from your understanding of users, your feel for the market, and honest assessment of your capabilities. AI can amplify your execution speed by 10×. But if the direction is wrong, you are just moving 10× faster toward the wrong destination. The product that reached the top of the charts succeeded not because its code was good — it was very ordinary code — but because it precisely hit a real need. A simple feature solved a simple problem.
Pitfalls to Avoid
| Trap | Symptom | Solution |
|---|---|---|
| Feature creep | Keep adding features, never finish | Return to SPEC.md. Features not in the spec go in a backlog, not the current session |
| Context pollution | Session gets long, Claude forgets earlier code structure | Start new sessions promptly, let CLAUDE.md and the codebase carry context |
| Skipping verification | Claude writes 10 files, bug in file 2 goes undetected | Verify every module. Slower is faster |
| Env var chaos | Works locally, everything is undefined after deploy | List all env vars in CLAUDE.md, use a checklist before deployment |
| Over-delegating to AI | Claude says “this approach is best” and you accept without thinking | AI proposes, you decide. Especially architecture choices — always make the final call yourself |
Knowing these traps in advance will save you a lot of rework.
At this point, you have everything you need to independently build products with Claude Code. The final chapter steps back and addresses a few deeper questions.